Bookcover creation

Barcodes!

Yes you can tell I’ve been doing a bit of Book Covers rather than writing.


What’s up with Barcodes?

Barcodes have information about your book for stores to scan. Usually it’ll be your ISBN number, and if you see a 5 digit number next to that, that gives pricing info. (usually you’ll see 90000 which means no price details in this barcode)

So when you publish your book, you’ll need an ISBN number.

You can get this in various ways. Depends on your country. Best way to find out is to google how to get ISBN number in your area. For example, in my country you can get a free one as long as you give a copy of the book to the national library.

And… how does this relate to my book cover?

(Why do I always make these questions sound so… sassy?)

Let’s keep it simple. Do you have a barcode? (You can get one by providing your ISBN number to various online pages), then give that to your book cover artist.

Follow this step:

Do you have a ISBN number?

Yes No

Is it a Free KDP one? Either stop here? Or get one/ free one from KDP

Cool you can ONLY use that

ISBN/Barcode for KDP.

If you want to publish at

local printer or Ingram,

you gotta get your own.

Give your ISBN number to your Cover Artist.

Tell them whether you want them to get a Barcode for you and put it in a specific place. If you don’t, KDP will slap it on for you automatically on the bottom right corner at the back of the book.

Simple!

Fun Book Covers

Funnily enough, I decided to take book cover designs seriously after a would be client said they had to go with their publisher’s book cover artist.

I had the design brainstorming in my head, done my research and was eager to start the discussion with the author and it was poof, all gone.

I then realized how much I like the process of making the book covers, and thought “well, they are really missing out!” and thought to go out there and actually put more effort in.

Previously I had been just putting my book covers online and never advertised, just let people find me. But the fire was lit! I made a instagram page, facebook page, started a competition, made connections, bought so much photos and fonts, studied a bit more, and my spare times filled with browsing book covers.

So! If you’re wanting book covers, talk to me! or come visit and you can see how it works here :)

I’ll kick off with my Fun Book Covers.

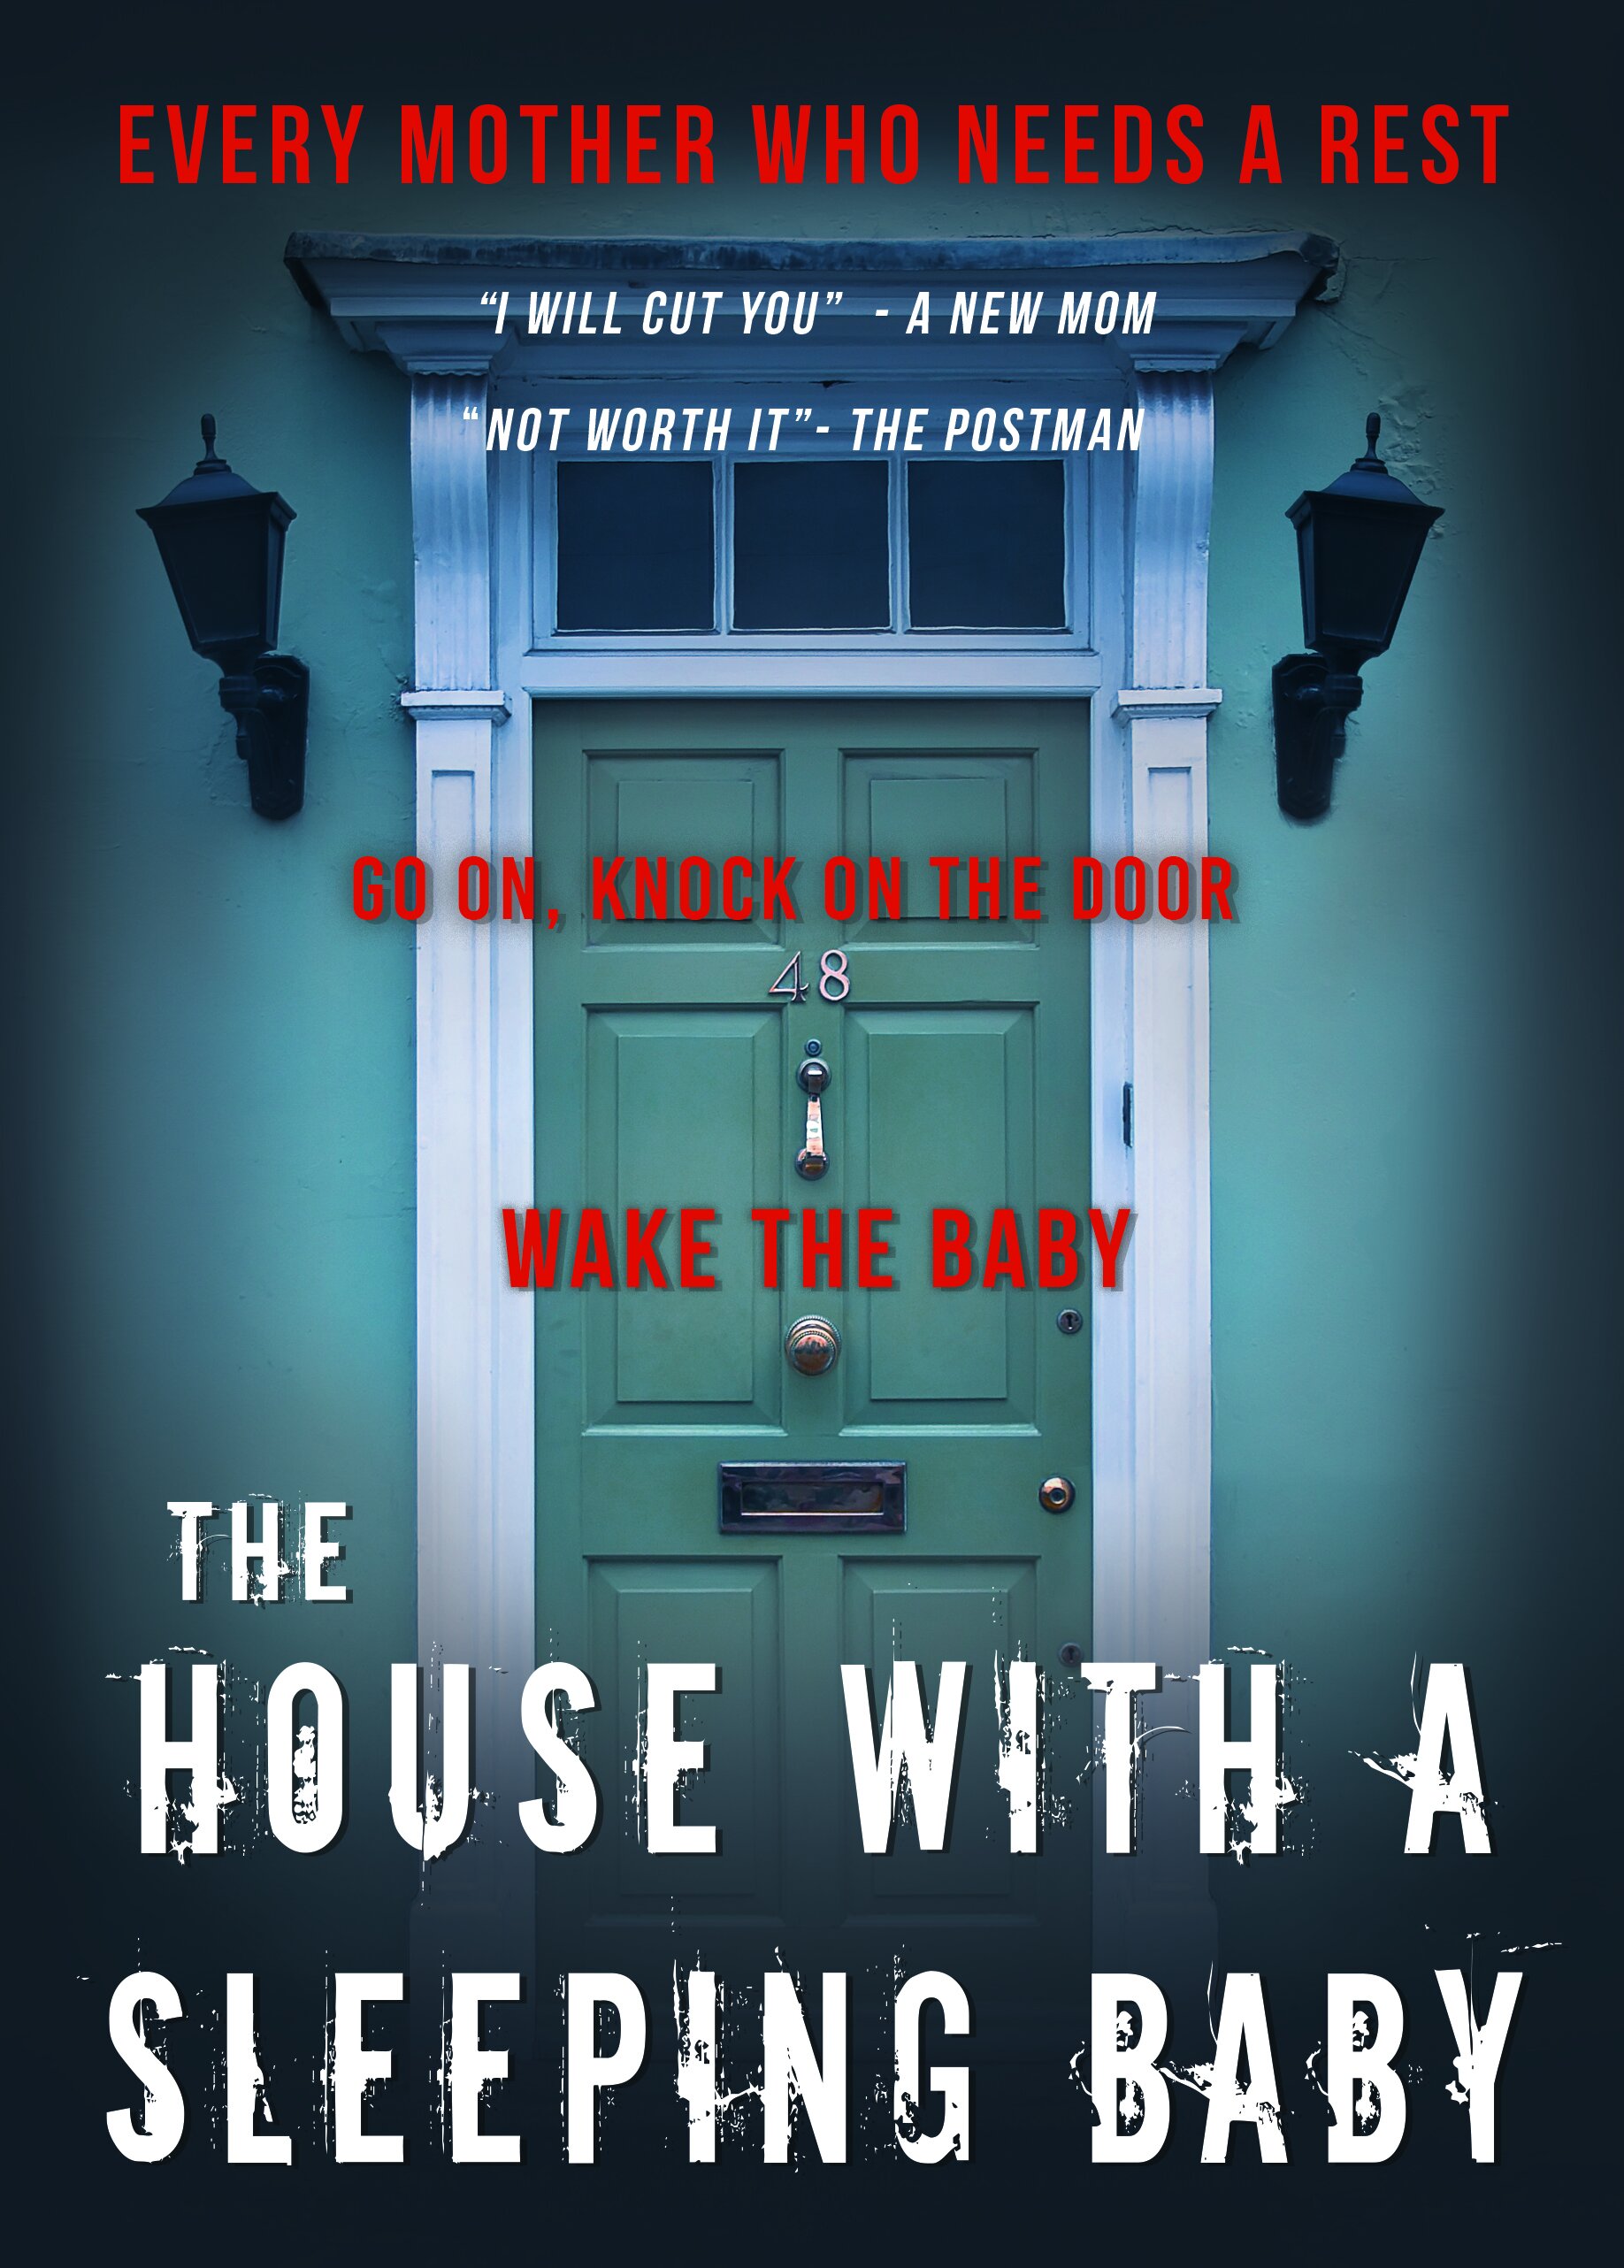
I decided to whip up a mock book cover to practice genre, theme and skills. The challenge is that the book cover creation process cannot take more than half a day because this is a mock up. Not an actual product! I do get ambitious though…

Let’s start with this one:

Wakemykid.jpg

I’m currently working with a client for their thriller novel, so I was doing a bit of research on the genre.

Horror/Thriller genres:

  • A lot of Blue/orange tone

  • There’s a lot of small lines like “Who killed XYZ?” “What happened to XYZ?” etc.

  • There’s a lot of text in horror/thriller book covers

  • A lot of low angle shots.

  • People’s faces are obscured.

  • A lot of female/children images in there. (The whole vulnerable people/ fear of unknown/ making you feel small elements are used!)

  • Text are usually sans serif

  • Text colours are usually quite bright. Whether it is red/white or yellow. Pretty fun

  • Edges are usually all black

  • A lot of house over the hill images, while the text is underground.

  • A lot of photos. not many hand drawn. But some I’ve seen. Wow. They are amazing. I think if you have a great cover designer, they can make you a hand drawn one. At a lot more cost than a photo though.

So if you’re a thriller/horror writer, keep these in mind! :)

My process with the above picture. (It looks lighter online here…)

  • Come up with an idea. I started with wanting a horror/thriller book cover but relating to mums. (After all, I am one, and I like funny)

  • Come up with a title. Wow that was hard. That itself took two days?

  • Find images. (I doubt I’ll ever hand draw a mock book cover. It takes way longer than finding a photo)

  • Play with different images, work with fonts/title and see which one suits well. I had three images at first, one had the entire house, the other had a door knocker close up.

  • Font… I didn’t put too much thought. Just whatever I liked. Looking back, if this was a client’s one, I probably wouldn’t use that font. Fun fonts are good, but can look tacky if not careful.

  • decided to go with blue tone rather than sepia.

  • Difficulty with this image was that it was too small to fit my canvas. Stretching an image is a no-no. You do not want to stretch your image. So I had to draw the edges to match the middle image.

  • Play with colour/contrast/gradient.

  • Add texture to the walls and door so it wasn’t so shiny and new.

  • Finished!

What can I do better with more time?

  • Would definitely put more contrast. Make the door really pop out.

  • Change Font for title.

This thing took… 3 hours, not including coming up with the idea. Hoping I can get faster.

Zombie in a Spacesuit!

What fun title!

One thing I love working with Mike Johnson is due to his quirky titles.

So! I didn't have time to read this novel this time - due to my own being published and a gasp - a baby on the way! Surprise!

So in events like this - I ask the authors to tell me about their novel and what they love about it. 

Aside from the name I could tell it was a fun, whimsical and crazy kind of book. 

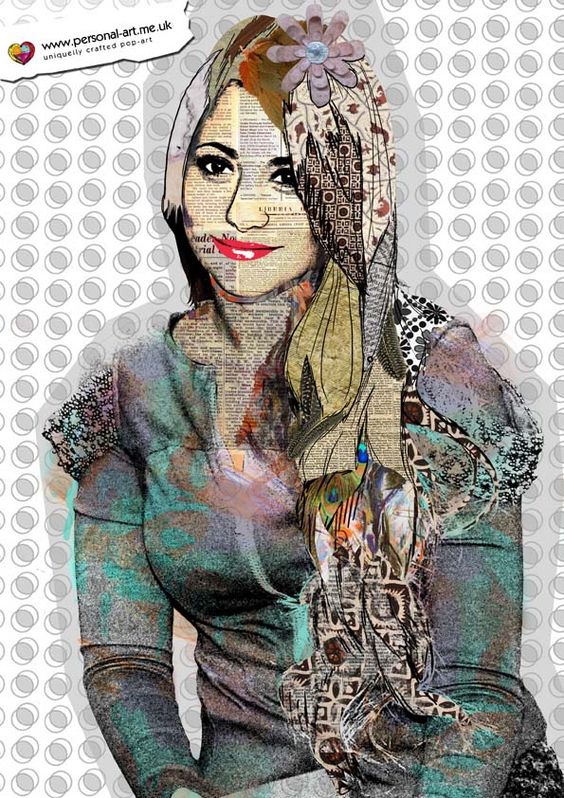
So I wanted to try doing a collage style of books! 
 

Just some examples I've found on Pinterest!

So I spoke with the author, ran my ideas with him and he was (as usual) happy to go along with it! So I gave him few collage pictures I've found online to ask which style he preferred. He chose one, and off I went. 


Now - everyone knows I avoid stock photos because:

dbfb855af4622cbdd959ecf110d783bf.jpg

A: I don't want my authors to have the same cover as someone else. 

B: That weird selling more than 500,000 copies thing... part on their contract annoys me!

But... when it comes to making a collage book cover... I was sorely tempted to get one!

Luckily I was able to find high quality photos that I've taken! Yay for travelling! And also free rights photos (Wow they are hard to find) 

And of course I was able to draw a lot of things and use textures to make them look like cut and paste versions. 


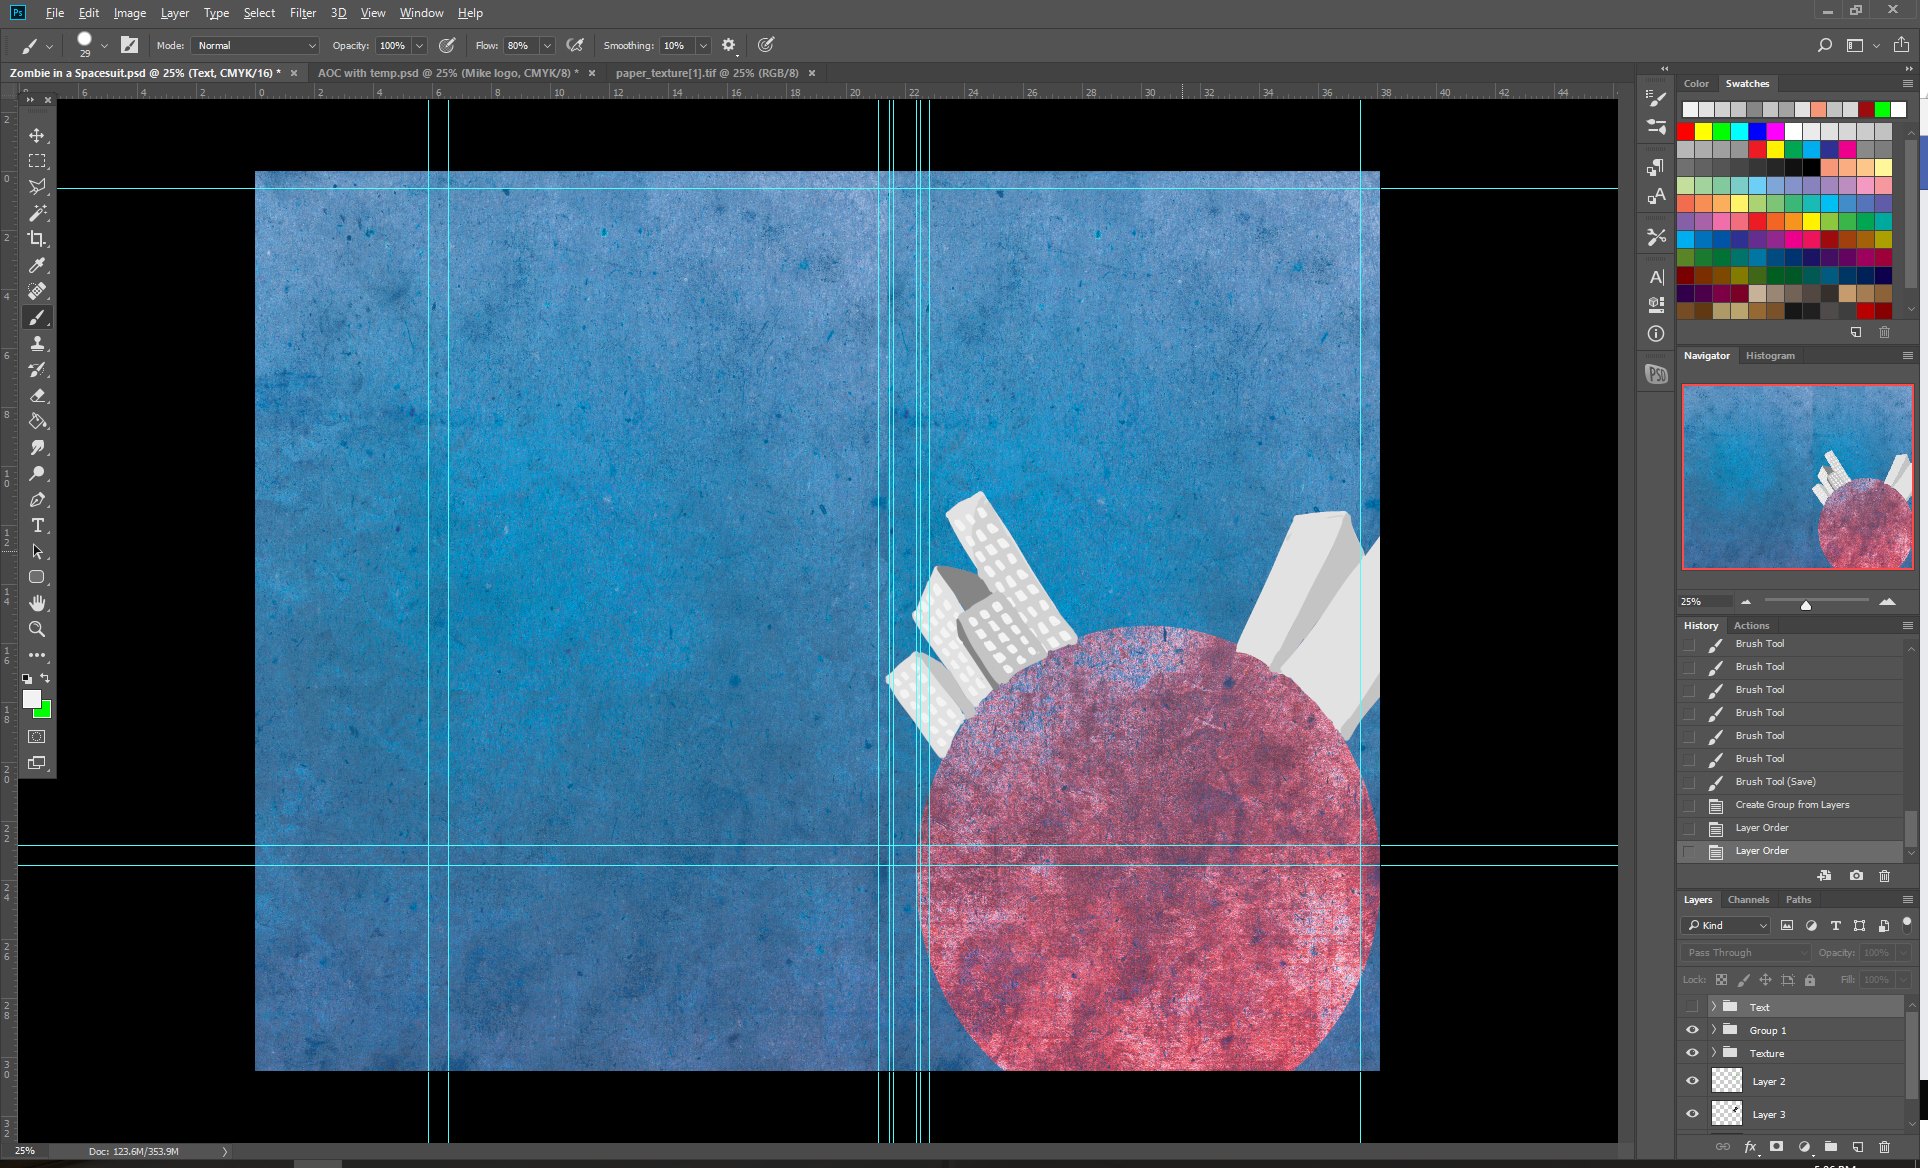
So Step one as usual: is the Green lines:

23847321_530180643991842_3069928410964140211_o.png

Step two:

I didn't do outlines, I just started to draw as collages don't have outlines! 
Got some nice textures, thought of Blue - for space and just crazy red/purple/pink for a nice contrast. 
 

24130160_530180377325202_6933610028326369241_o.jpg

(As you can see - at this stage, I wasn't sure what size the author wanted the book or the final page numbers... (no template) so I am using an approx measurement from an old book cover template I had. 

Step three: 
 

23905648_530518330624740_696866343621550779_n.jpg

Added a moon and Buddha as it's relevant to the story. Also a splash of color at the back to make the  back look a bit interesting. 

Step four: 

Draw the actual Zombie. It took a while trying to decide what style to draw the zombie... should I have the edges like  it's been cut out? Should I put a newspaper texture over him? In the end I decided just clean white with shading will pop ou…

Draw the actual Zombie. It took a while trying to decide what style to draw the zombie... should I have the edges like  it's been cut out? Should I put a newspaper texture over him? In the end I decided just clean white with shading will pop out. 

Add him in... give him some shading... 

23916559_530518810624692_6244671791710136465_o.jpg

Step five:

Go and find a lovely font for the front, spine and back! I loooove Dafont.com

24067848_530519203957986_3118328756084123959_n.jpg

Had the blurb from the author so added that in. 
Had some reviews from him too - so added that in.

Step six!:

Now to bring on critiques that I trust... (It's super important that you're not just asking any random person for feedback... I recommend someone that's proven to give you constructive feedback and someone that isn't afraid to tell you you've done something off.)

I fortunately have two art critiques that has art background and also proven to give me amazing feedback, so have sent it to them.

Also asking husband because of his design background... he is amazing with typography. 

And of course... the author's feedback is important too! If he hates it, then it's back to the drawing board... but at this stage I would charge for that time. Luckily he liked it! 

Step Seven!: 

Usually this would be the last step... just touch ups - convert to PDF... but there are some issues! Page numbers may change! Reviews and blurb needs to be proof read! (Even if it has been proof read, it's good to have one more check before it's finalized) 

So... once that's done! It'll be sent off! :D